How to Optimize Your Blog Images
Something I’ve noticed among a lot of my bloggers friends is that they don’t have any idea about image optimization. They’re unaware of the amazing FREE tracking tool they can use on their blog and that uploading full size images makes their blog’s speed slow.
Many bloggers upload their high res (and large images) directly to their blog. You may be wondering, what’s so bad about that? You want high quality pictures on your blog, not a blurry and low res ones.
The thing is most of the photographers out there will send you high res files in case you need to use it for print, which is good! For the web (aka your blog), you want a 72 ppi picture. The moment you upload that 300 ppi picture to your blog it’s going to make your website slow and NO ONE wants to be on a blog that takes forever to load.
Also, most photographers don’t change the name of your photos which won’t help with SEO (search engine optimization). For example, say you go to your favorite blog and want to save a picture. When you save it, the name of the picture is “IMG_1234.jpg”. This looks horrible, but the important thing is that it’s not helping you as a blogger because it makes it much harder for Google to find your content.
If this is confusing to you, don’t worry! Let me help explain it to you by showing you the process I personally use.
What’s image optimzation?
Optimizing your images for the web means saving or compiling your images in a web friendly format depending on what the image contains.
Images often account for most of the downloaded bytes on a web page and also often occupy a significant amount of visual space. As a result, optimizing images can often yield some of the largest byte savings and performance improvements for your website~ Google Developers
What’s 72 ppi?
A screen is considered 72ppi (or 96ppi). Ppi is short form of pixel per inch, also called as dpi, dot per inch. That’s your resolution. Your screen doesn’t need more than that.
Why is important optimize your images?
- It helps people find you online in Google and Pinterest.
- Your blog’s speed is fast!
- Your blog load time contributes to your SEO ranking.
Your blog’s load time also contributes to your SEO ranking. Keep your blog speed up by re-sizing your images (don’t upload images at their full size) before uploading them to your blog.
If you’re like me and save your images as PNG files, you can use TinyPNG or Website Planet to reduce your file size without losing the image quality.
My process:
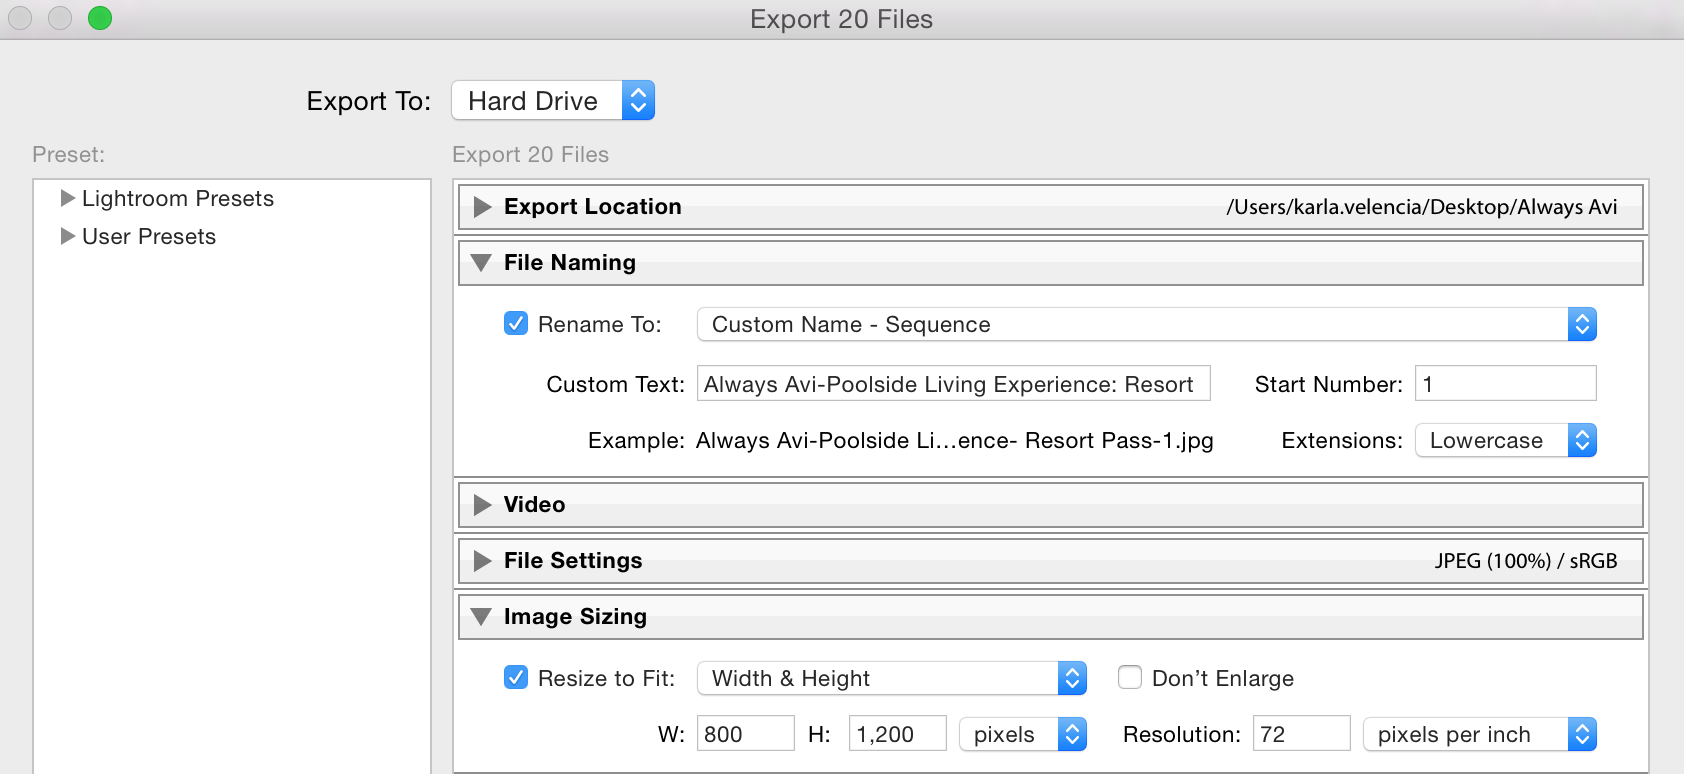
When a photographer sends me a set of pictures, I upload them to Lightroom (only the 5-10 I need for the post). I don’t edit them because they already are, I just do this for SEO purposes.
I rename my picture first with the name of my blog: Always Avi and then the title of the blog post. Then I resize them to my blog’s dimensions. This depends of your theme. Every theme is different. Mine is 800 x any height I want, but I like to have them 1200 and then 72 ppi.
Even if your picture is already 72 ppi, it stills holds data on it. At my workplace, we take optimizing images very seriously, because we don’t want our website to be slow because we lose sales. The web developer gets frustrated with us when we send a large picture or graphic.
My recommendation is to use Tiny Png: https://tinypng.com/. It really compress an image and still keep its quality. When I was working at Bloguettes, we used https://imageoptim.com/mac/. It doesn’t take than 5 minutes (obviously if you’re only optimizing like 5-20 pictures at once). I know they are plugins too, but I don’t have any experience with them. Maybe you can help me learn about that, but for now I’m happy with Tiny Png!
Final step! When you upload your picture to WordPress, you can see in media when you click your image, this window. I know it’s tedious. I admit I can be kinda lazy, but THIS IS THE IMPORTANT PART!!
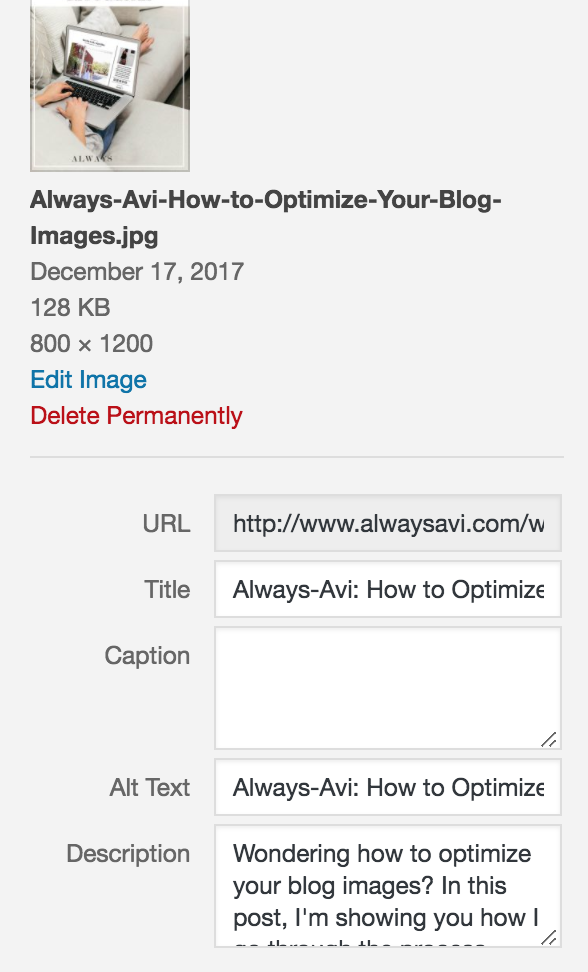
Change the title of your image to the tittle of the blog and blog name. Copy and paste it to your Alt text. Search engines can’t actually see your images, so they use your alt text to determine what the image is. Then write a description that can be your meta description. This is helpful when someone pins an image from your blog.
That’s it! I really hope this helps you. It takes awhile but once you starts doing it, you’ll get the hang of it!
Don’t forget to subscribe to my biweekly newsletter for more blogging and social media tips, here!